If you venture back to my 2023 resolutions, you’ll see that one of my goals for this year was to finish the Liberation Kriya. It was also one of my goals to do yoga at least once a week…well, we’re in February now and I completed the Liberation Kriya AND a 30 Day Yoga Challenge (more on that in a future post 🙂). Today, I’m going to talk about my experience with the Liberation Kriya.
Now, what is the Liberation Kriya? The Liberation Kriya is a 40-Day Meditation Challenge where you meditate for 40 days from beginning to end. If you skip a day, you have to start the 40 days over again. The meditation itself is 9-minutes long and consists of 3 mudras (poses).
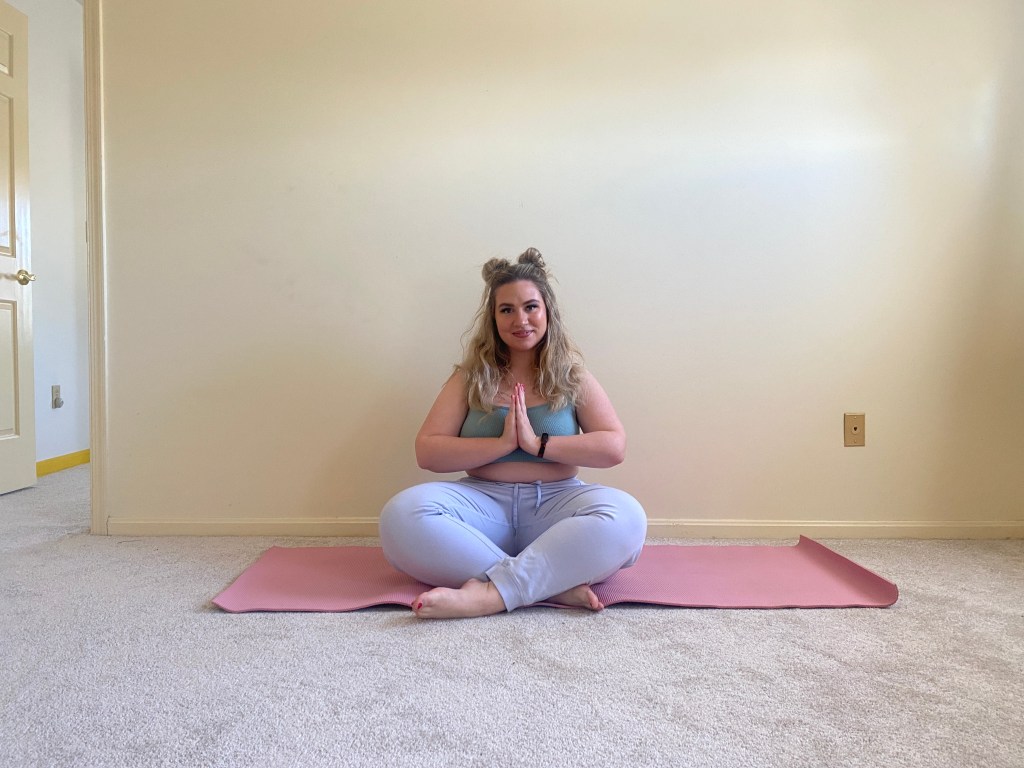
You start seated on the ground cross legged, with your right arm lifted 60 degrees in front of you and your left arm pointing 60 degrees down towards the ground behind you. For the first mudra, you point your index finger with both hands at the sky and down below, your thumbs locking down on the other fingers. Both palms are facing down. You hold this mudra for 3-minutes. Then, you point your pinky finger along with the index for 3-minutes. Finally, you straighten all fingers and hold for the final 3-minutes of the meditation. If your arms drop at all, you start the 9-minutes over again. Sit with these mudras with a straight spine.

It is suggested to focus on the chin, also known as the moon center in kundalini practice, to better realize your emotions. Or, you can just try to focus on your breathing. If the mind wanders, center back at the breath.
Now the first time I tried my hand at the Liberation Kriya was at the beginning of 2022, and I lasted for three days. That’s it. Three days. I found the practice so difficult on my arms, I just quit. It was the first kundalini arm exercise I’ve tried. I was also in a very different mindset back then. I was more anxious and was doing it for the wrong reasons. I heard about the Liberation Kriya online and it seemed like a trendy, health guru-ish thing to do.
This time, I did it for myself.
I wanted to prove to myself that I could keep my own promises and I could push through. And that’s the point of the Liberation Kriya. You build so much inner strength from this journey and you remember, or realize, that you can and should trust yourself. You can persist. You’re able to follow through.
So with that, here are some tips to completing the practice and lessons I’ve learned.
1. Focus on your breath
In this day in age, I think it’s common for people to start healthy habits for aesthetic reasons. When I first attempted this challenge, I was definitely inspired by the ‘that girl’ trend. For the first week of the challenge this time around, my arms shook terribly, trying to hold my arms up. Not ‘that girl’ aesthetic or vibes at all. I felt out of shape, but what made it easier was focusing on my breath. I would breathe audibly and sometimes even chant or vocal tone the letters a e i o u. This helped me no longer focus on how badly my right upper arm hurt, which was the only part that really hurt throughout this practice for me. By day nine, my arms didn’t shake at all.
Your breath is the only constant thing in this practice that you should focus on. Your arms will shake, they may drop altogether, and your mind will definitely wander, but you can always focus back to your breath and remember your intentions for starting this challenge in the first place. Don’t get too wrapped up in the pain in your arms or negative self-talk. Take it day by day and just breathe.
2. 9-minutes isn’t a long time
Another reminder you can tell yourself if your arms are hurting and you’re struggling through the timer, is to remind yourself that 9-minutes isn’t a long time. 9-minutes a day for 40 days isn’t a long time, especially when you consider that you’ll experience a life-long change and opinion on yourself and what you’re capable of.
3. It becomes more of a mental challenge later on
There’s a ton of information out there on how to meditate, the benefits of meditation, and what to do when your mind wanders. And let me tell you, my mind definitely wandered during this challenge! During the last 10-15 days of the challenge, I grew, dare I say…bored?! My arms no longer hurt that much and at this point, I was just waiting for the timer to go off. I was impatient. When these moments arose, I remembered the first two tips: Focus on my breath, and that 9-minutes isn’t a long time. Again, this is when vocal toning and audible breathing come in handy. It took a lot for me to not open my eyes and just stare down at the timer, but eventually, that’s what you’ll have to stop doing.
4. Accept where you’re at
The comparison game is a trap many of us get caught in every now and then. To succeed at this meditation challenge, you have to accept where you’re at and not compare yourself to others, including myself. It may take longer for you to not feel pain in your arms, perhaps you feel pain later in the day, or maybe you drop your arms and have to start over again. Don’t give up on yourself. There are lessons to be learned on this journey, and this is one of them. The Liberation Kriya isn’t an overnight hobby that you breeze through and complete (if it is for you, you’re very lucky). The beauty of the challenge is not the practice, but the commitment. You’re not only committing to the challenge, but committing to yourself, as well. It takes determination, dedication and self-acceptance. You’re worth it.
5. Make it consistent
Before starting and completing this challenge, I would wake up in the morning, go to the bathroom, feed my cat, sit on the couch and scroll through my phone until my boyfriend came up with my morning cup of coffee like an angel. I wanted to stop doing that, and this was my remedy. After feeding my cat, I would go straight to our spare bedroom, close the door so the cat wouldn’t disturb me, plop my butt on the floor and start the meditation. During the course of the 40 days, we traveled, and I still did the meditation during that time. You really only need a quiet space with a spot to sit on the ground, or even in your bed. Doing it first thing in the morning is what helped me make the practice consistent in my routine, and broke my bad habit of morning scrolling.
6. Make it attractive
Now, our spare bedroom where I did the practice is not the most attractive space. There were shipping packages on the floor for when I ship Poshmark orders and the walls are covered in the most hideous yellow and white gingham wallpaper (very 70s, thanks to the elderly couple who lived in the home before us). Regardless of the room not being attractive, it served its purpose for me. However, you may want to make the challenge more ritualistic and aesthetically attractive to encourage you to complete the challenge. You can light incense, palo santo or candles, or put on some relaxing music.
Here’s my meditation and mindfulness practice playlist:
7. Keep your intentions clear
Before beginning the challenge, I suggest writing down why you’re starting the challenge and what you hope to get out of it. When you’re experiencing discomfort or find yourself comparing yourself to others or thinking of giving up, you can return to your intentions for the challenge. Tune into your body, your breath and the present moment, and let everything else slip away. When your mind wanders, observe and let them pass you by. That is the magic of meditation.
I wish you success with the challenge. Please feel free to share in the comments below your experience with the challenge or even log each day. Much love,
– Amber
More resources:
